

Introduction
I use Plesk to manage all of my websites on a secure VPS. Along with this, I use Cloudflare’s CDN to help boost speed and security. A nice feature within Plesk is its integration with Let’s Encrypt’s free SSL certificates. This allows certificates to be generated automatically with a validity period of 3 months.
Frustratingly, I found myself having some trouble with the renewals of these certificates. Because of this, I decided to start utilising Cloudflare’s Origin Certificates. These certificates are free, easy to manage, equally secure as the ones provided by Let’s Encrypt, and they have a validity period of up to 15 years!
In this guide, I’ll assume you have Cloudflare set up and integrated with your website. You will require full access to the Cloudflare account and the Plesk server which manages the website. Let’s dive in.
Setting up Cloudflare for Origin Certificates
To begin, log into Cloudflare and select the domain on which you wish to set up the certificate. For this example, I will be using polychecker.com, a website uptime monitoring tool that, as of writing this article, I’m currently developing.
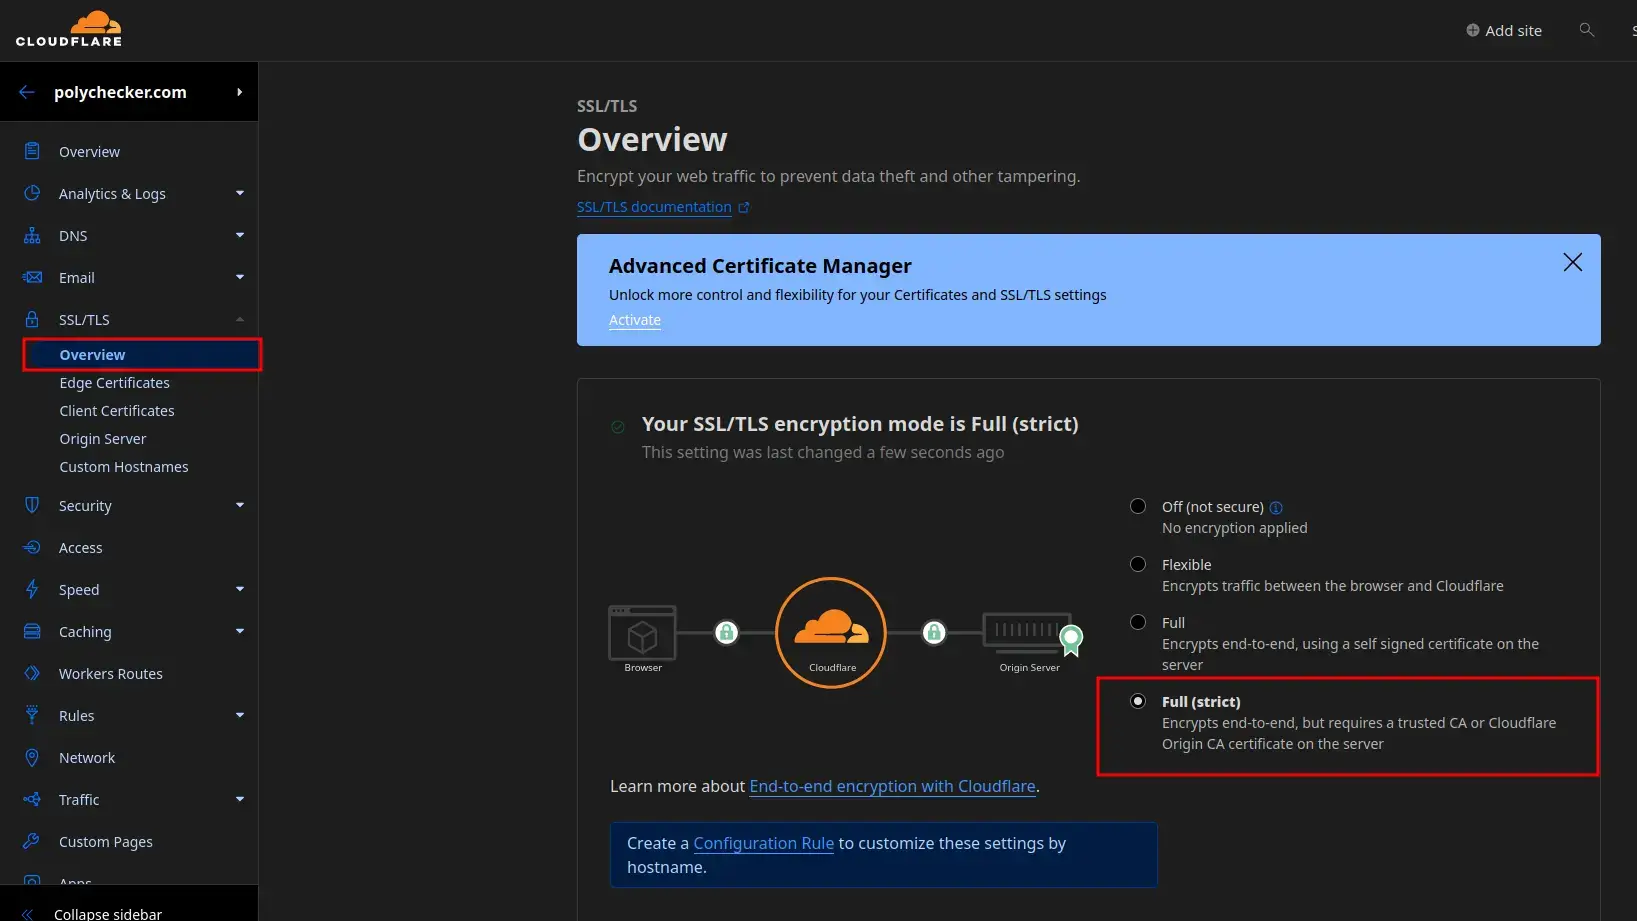
On the left-hand sidebar menu, select ‘SSL/TLS’. Under the default ‘Overview’ section, you will need to set ‘Your SSL/TLS encryption mode’ to ‘Full (strict)’.
Creating the Origin Certificate in Cloudflare
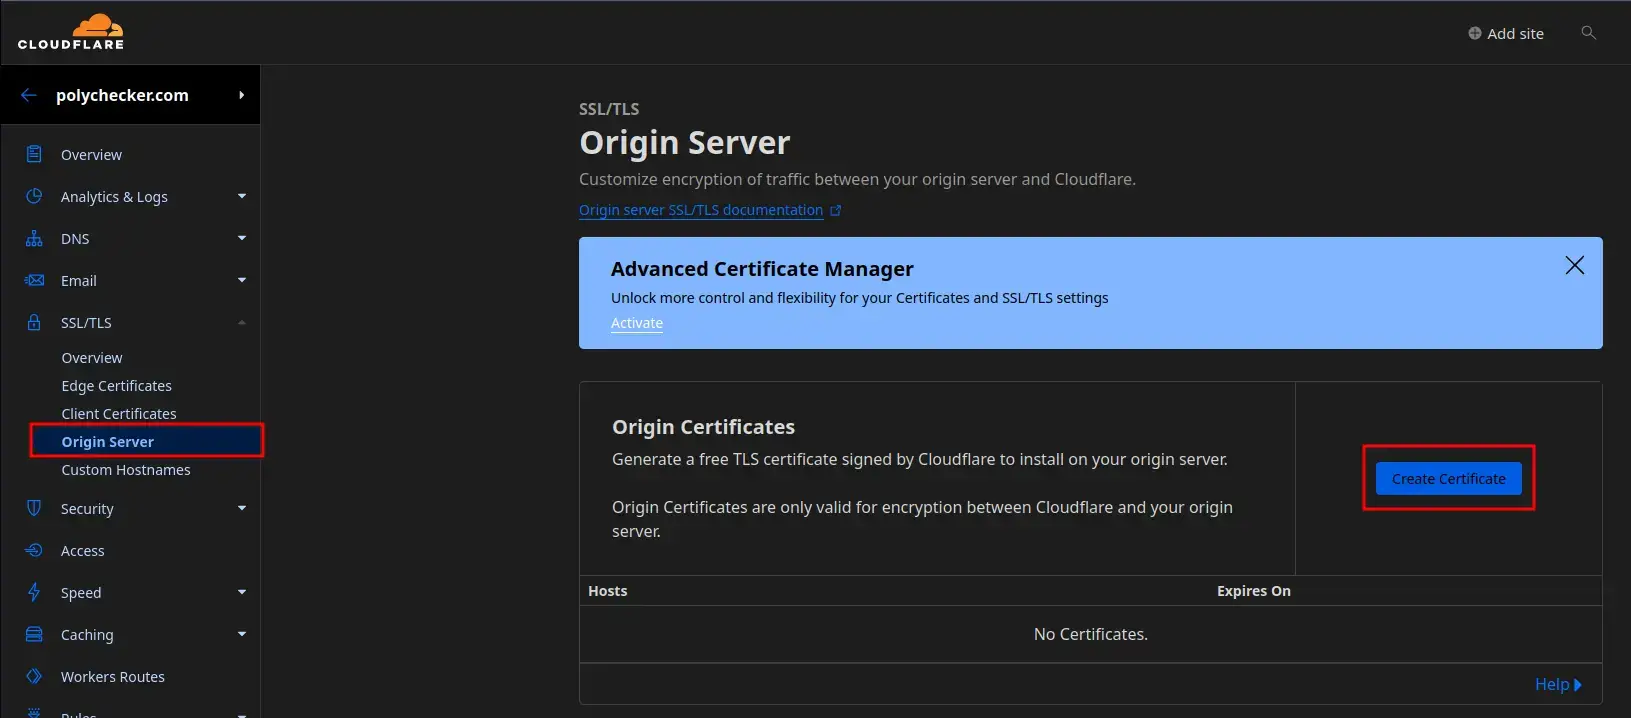
On the sidebar menu, select ‘Origin Server’, and then ‘Create Certificate’.
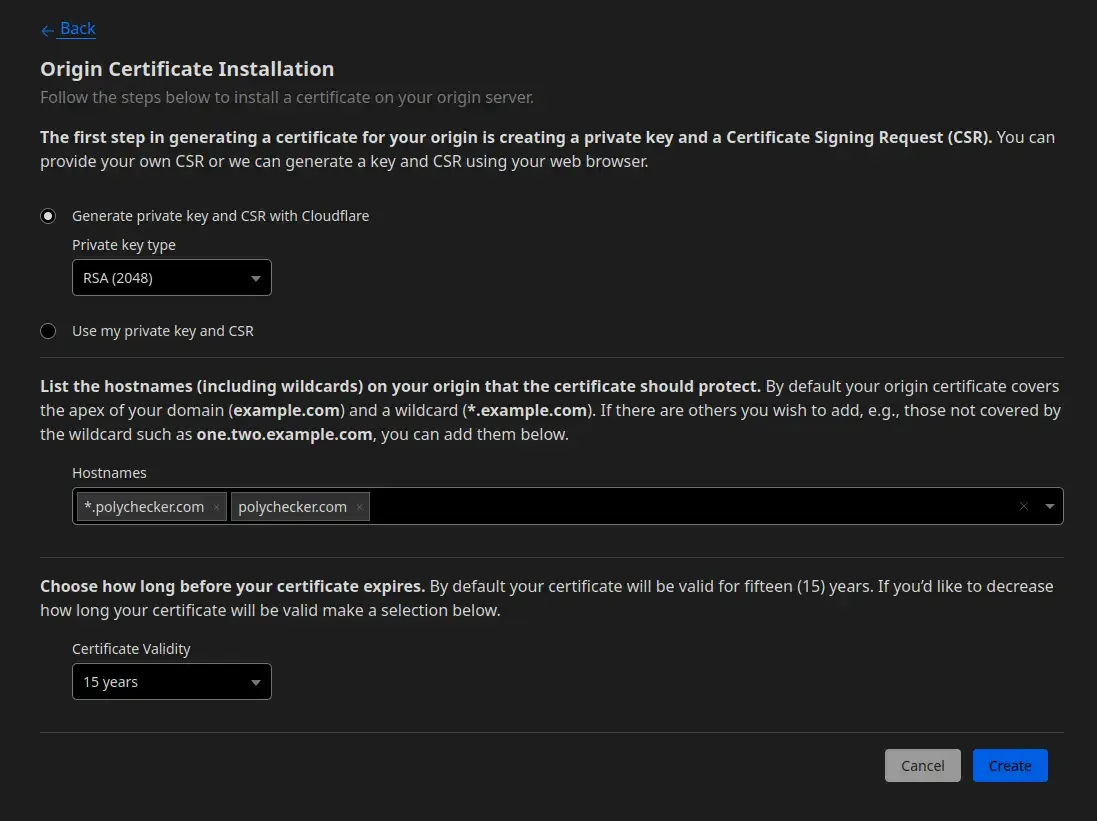
This is where we’ll set up the core properties for the certificate. Ensure your settings match the following as per the screenshot:
- Generate private key and CSR with Cloudflare
- ‘Private key type’ is set to: ‘RSA (2048)’
- Add any extra hostnames that are required which aren’t covered by the wildcard, such as ‘one.two.example.com’.
- Certificate Validity is set to your desired duration. Here I’m using ’15 Years’, the maximum value as of writing this article.
Once done, click ‘Create’ in the bottom-right corner.
Create a .pem file for Cloudflare’s Origin Certificate
You’ll now see a screen which shows you both the Origin Certificate and the Private Key. In order to use these on Plesk, we need to save them to a ‘.pem’ file.
To do so, open up your preferred text editor and create a file. I’ve named mine ‘polychecker.com.pem’. The file name isn’t important, so long as you know what file it is and it ends with ‘.pem’. Although using the domain is a good way to ensure there’s no confusion in future.
Here you’ll see how the file should be laid out (Note that I’ve blurred my keys for security):
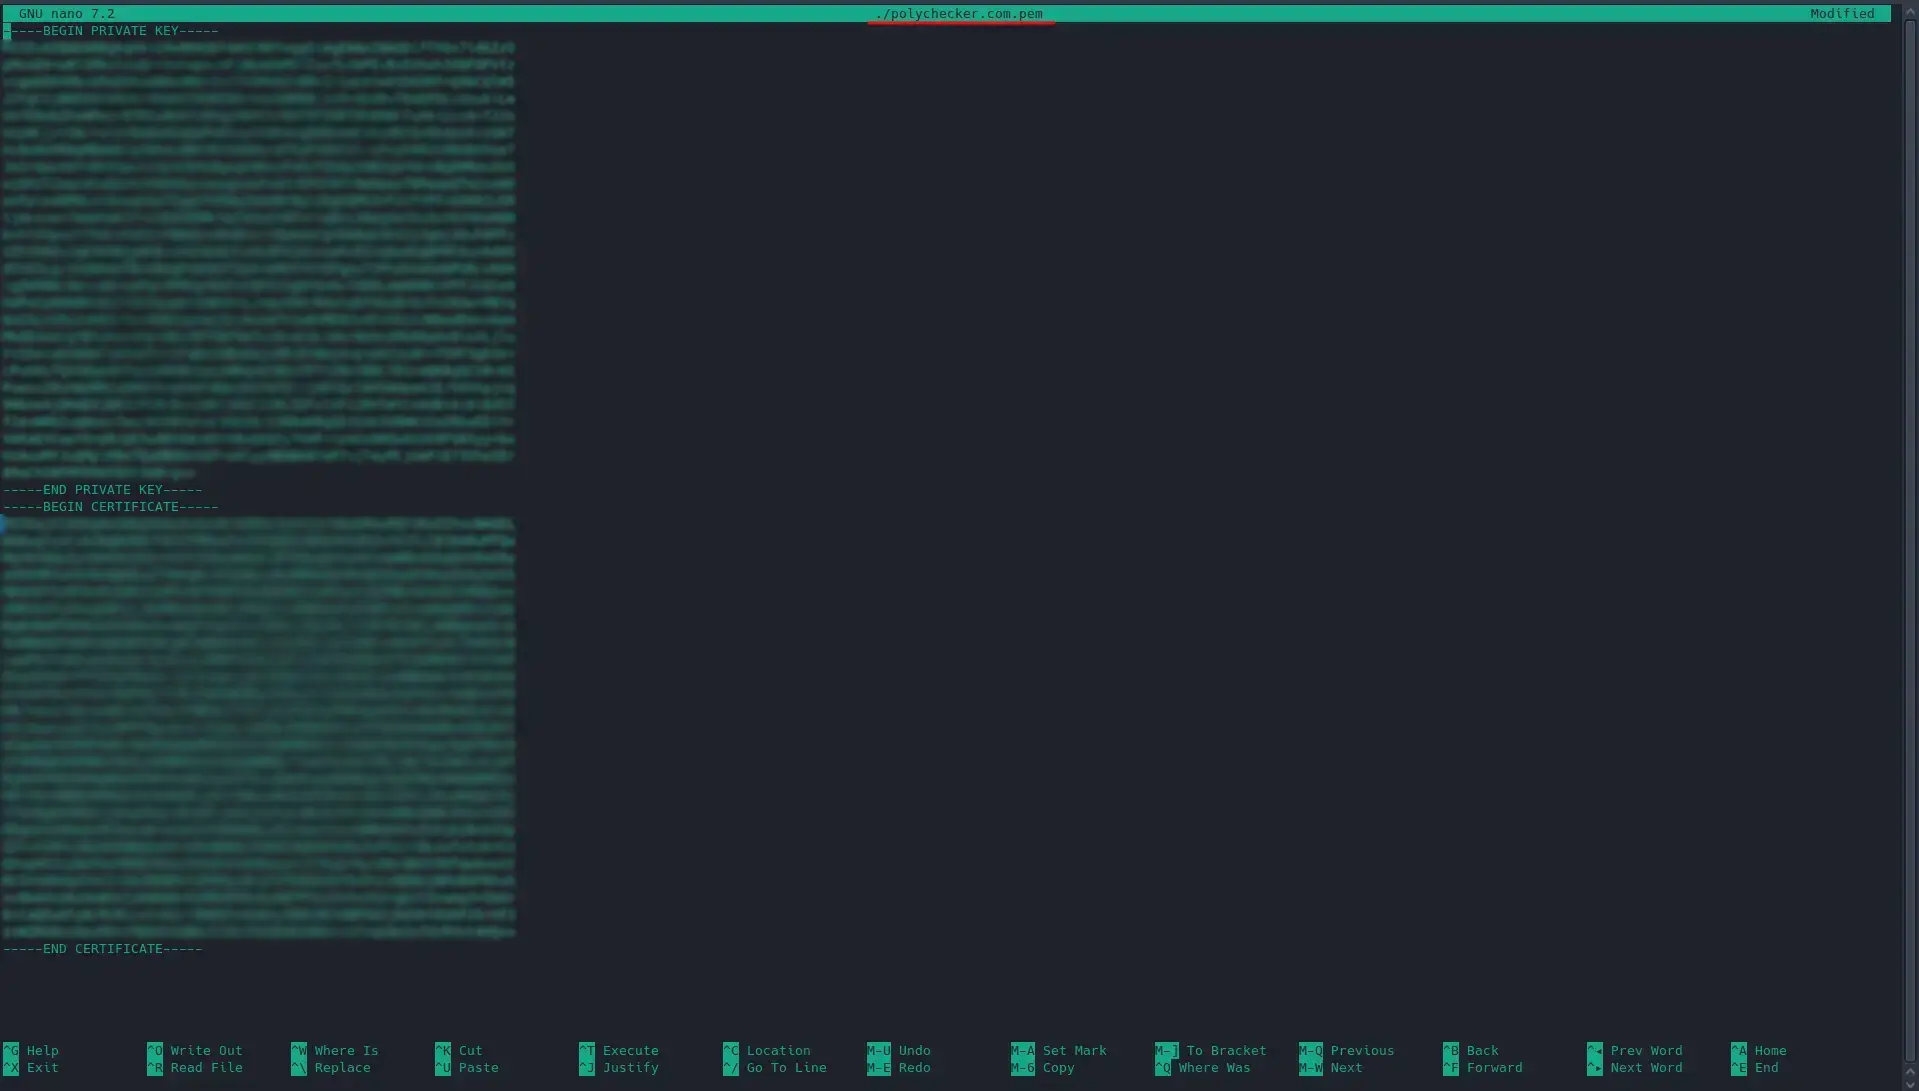
The structure must absolutely be:
----BEGIN PRIVATE KEY---—
KEY HERE
----END PRIVATE KEY---—
----BEGIN CERTIFICATE---—
ORIGIN CERTIFICATE HERE
----END CERTIFICATE---—
Once you save this file, you’re now ready to upload it on Plesk.
Upload a .pem file SSL certificate in Plesk
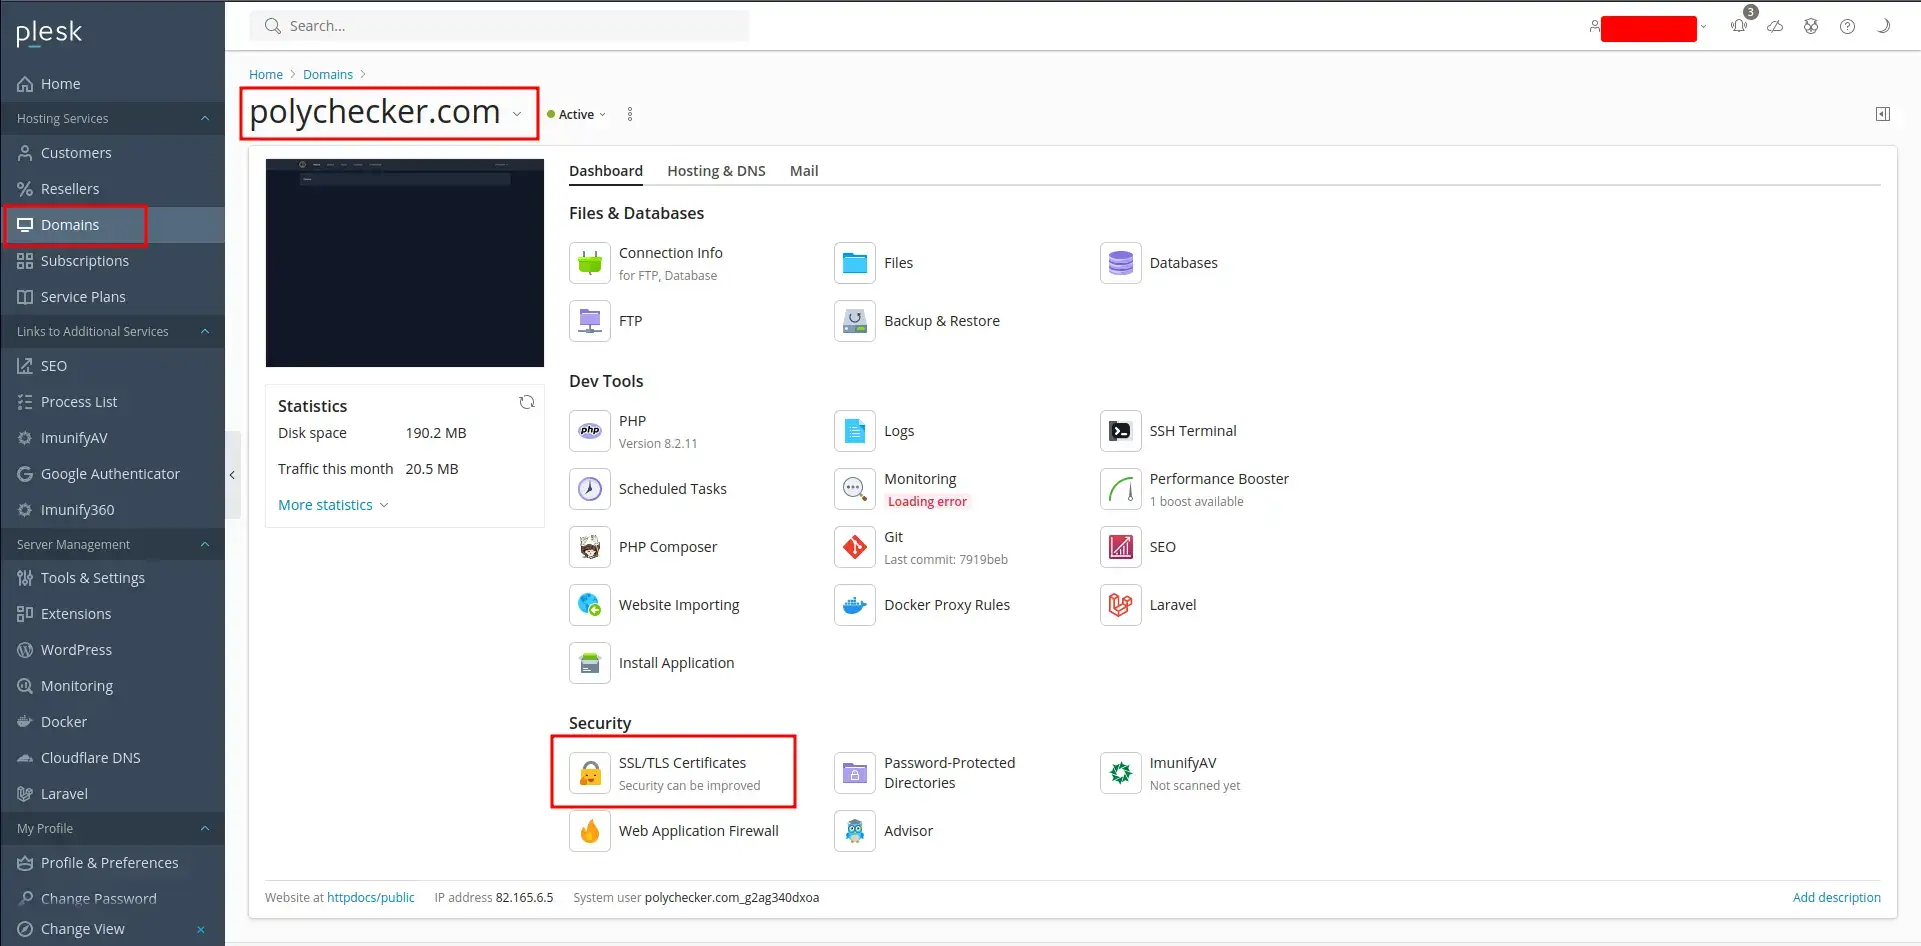
Log into your Plesk dashboard and click on ‘Domains’ from the left-hand sidebar menu. Then select the domain you’re adding the SSL certificate for. In my demonstration, this is ‘polychecker.com’. Once you’re on your domain, click on ‘SSL/TLS Certificates’, found under the security section.
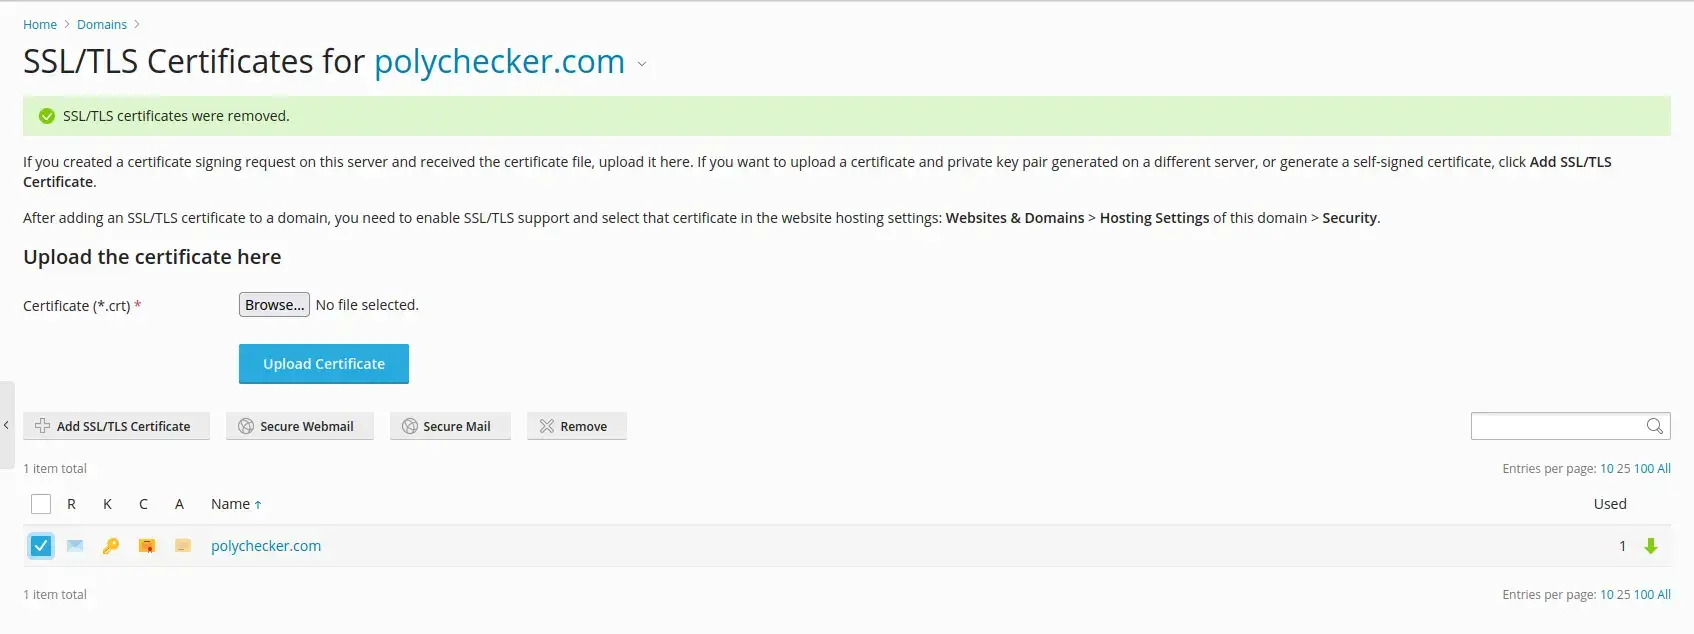
Note: If you have an existing certificate, you may need to click ‘Unassign Certificate’ on the top of page before you can add a new one.
Click ‘Upload .pem file’.
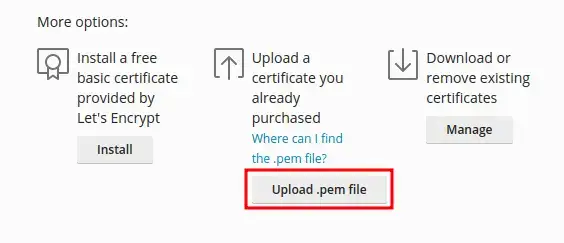
Select the .pem file that you created earlier.
Once selected, that’s it! Your domain is now secure. While you’re here, I’d recommend enabling the following two settings if you haven’t already:
- Redirect from HTTP to HTTPS
- Keep websites secured
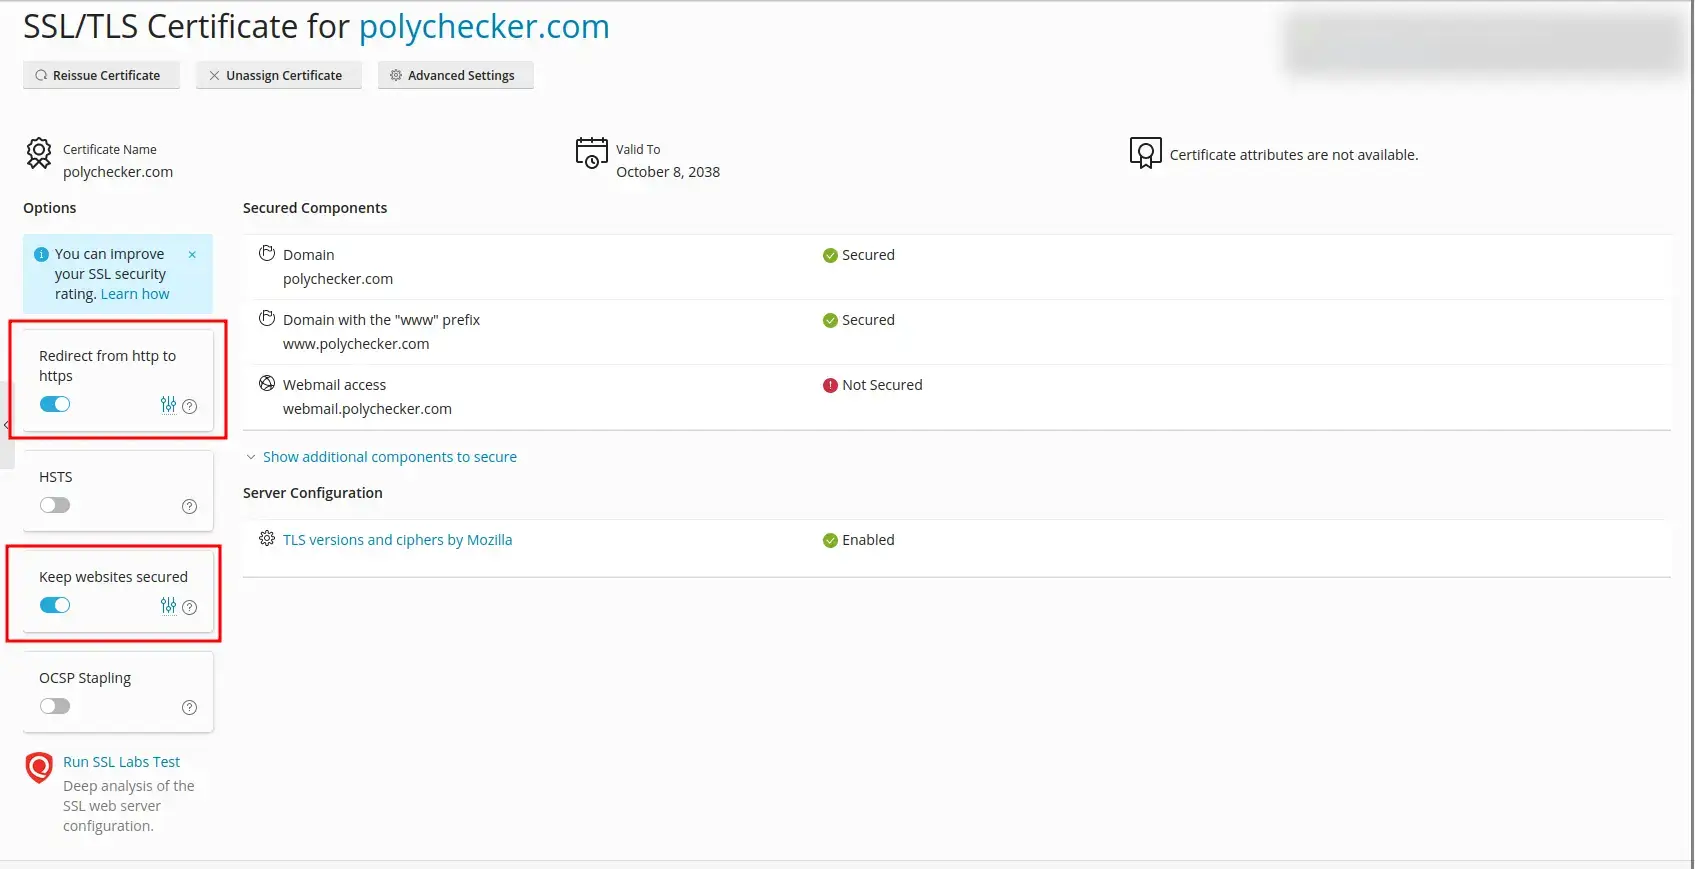
A final note: You’ll see that on my above screenshot it currently says ‘Webmail access’ is ‘Not Secured’. To fix this, you must manage your existing certificates, and then you can select the SSL certificate you’d like to use and click ‘Secure Webmail’. As long as your certificate was set up to handle this domain (which would be the case if you left the wildcard enabled), then your webmail domain is now secured with this same certificate.
If you host your own emails and use Cloudflare, you will likely not be proxying your mail subdomain. This means the certificate will not be valid to secure your mail directly. Please bear this in mind.
Conclusion
That’s all there is to it. While this likely seems like a lot of steps initially, once you’ve done it once or twice, you can carry out this whole process in less than a couple of minutes.
While this certificate won’t auto-renew, 15 years is a very generous amount of time for it to remain valid.
I love the combination of Cloudflare with Plesk, as it makes hosting WordPress, Laravel, and Node-based websites an absolute walk in the park.
If you’ve found this article helpful, I’d also recommend checking out the other posts I have categorised under Cloudflare.
Leave a Reply