

HTML Caching vs Static Asset Caching
If you use Cloudflare to proxy your website, you can take advantage of their various caching services. The most common one is static asset caching. Static asset caching refers to media such as images, CSS files and Javascript files. Between deployments and page reloads, these assets typically don’t change, so Cloudflare keeps a cached copy of these files that can be delivered more efficiently to users.
HTML page caching, on the other hand, has to be set up more intentionally. Take my website as an example: As it’s a blog where the content rarely changes, more often than not, the same content is being re-rendered over and over again by the origin server (The server to which Cloudflare is proxying). In this circumstance, instead of passing every request over to the origin server, I’ve configured Cloudflare to cache the HTML response and have also configured for how long this should be considered valid before the request should be re-fetched.
Before You Begin
While full-page HTML caching is very beneficial for static content sites such as my own, it does have the ability to cause issues on your website if not configured appropriately. For example, if you don’t have exclusions set up correctly and every page is cached in its entirety, visitors could see a cached version of a page from a logged-in user’s perspective. Additionally, if you have dynamic content that changes between page reloads or for different users, these might show incorrectly too and would need not be cached.
The point I want to illustrate very clearly here before moving on is that you shouldn’t consider this a one-size-fits-all solution. While this works for my website, this might not be appropriate for yours. I take no responsibility for any potential issues, downtime, or other interruptions in service that might come if you attempt to set up caching by following my guide.
To set this up on my site, I followed this article from Cloudflare. This was the source of my information, but my approach is slightly tweaked to my specific needs. You’re welcome to adapt my settings, or bypass my advice and use the linked Cloudflare article instead.
With all of that out of the way, let’s jump right in!
Setting up Full-page HTML Caching with Cloudflare
- Log in to Cloudflare and open the website where you’d like to set this up.
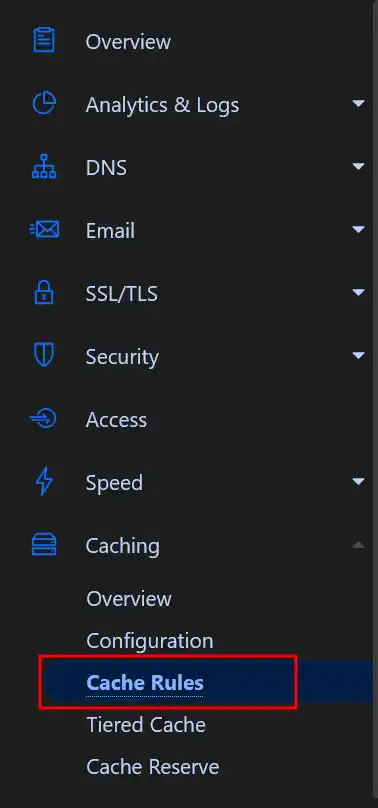
- Go to ‘Caching’ > ‘Cache Rules’:
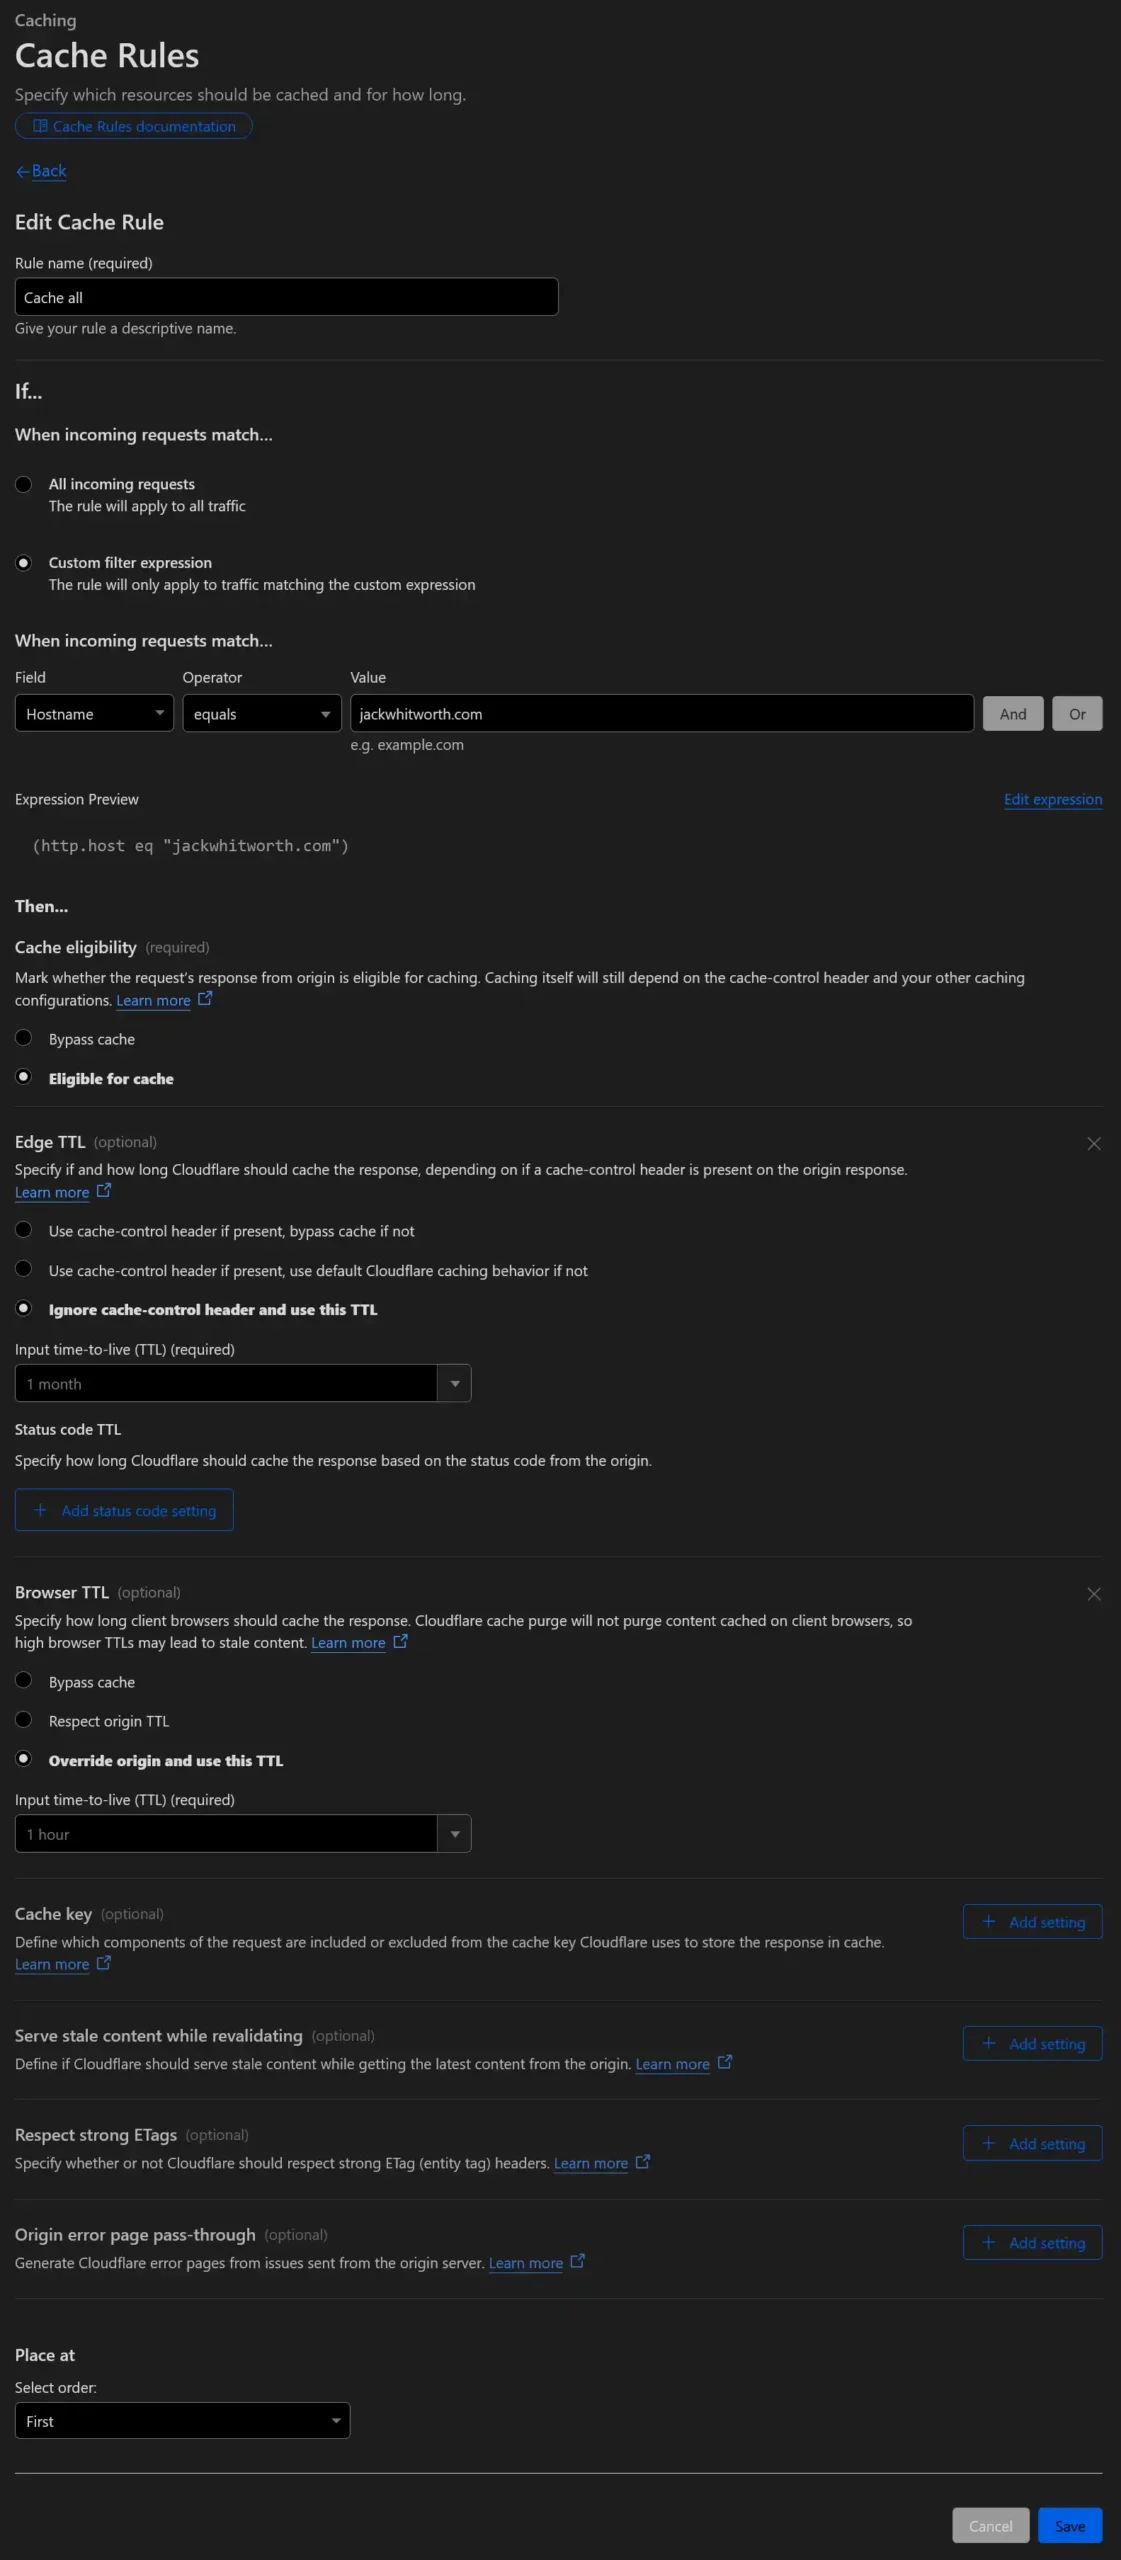
- Create a new rule with the following settings:
- Rule name: ‘Cache all’
- When incoming requests match: ‘Custom filter expression’:
- Field: ‘Hostname’
- Operator: ‘equals’
- Value: Your hostname, for instance, mine is ‘jackwhitworth.com‘
- Cache eligibility: Eligible for cache
- Edge TTL:
- Ignore cache-control header and use this TTL: (Up to you, depending on how often your content changes)
- Browser TTL:
- Ignore cache-control header and use this TTL: (I set this as smaller than the ‘Edge TTL’, assuming that ‘Edge TTL’ is a long time)
- Save this new rule.
Screenshot of my ‘Cache all’ rule
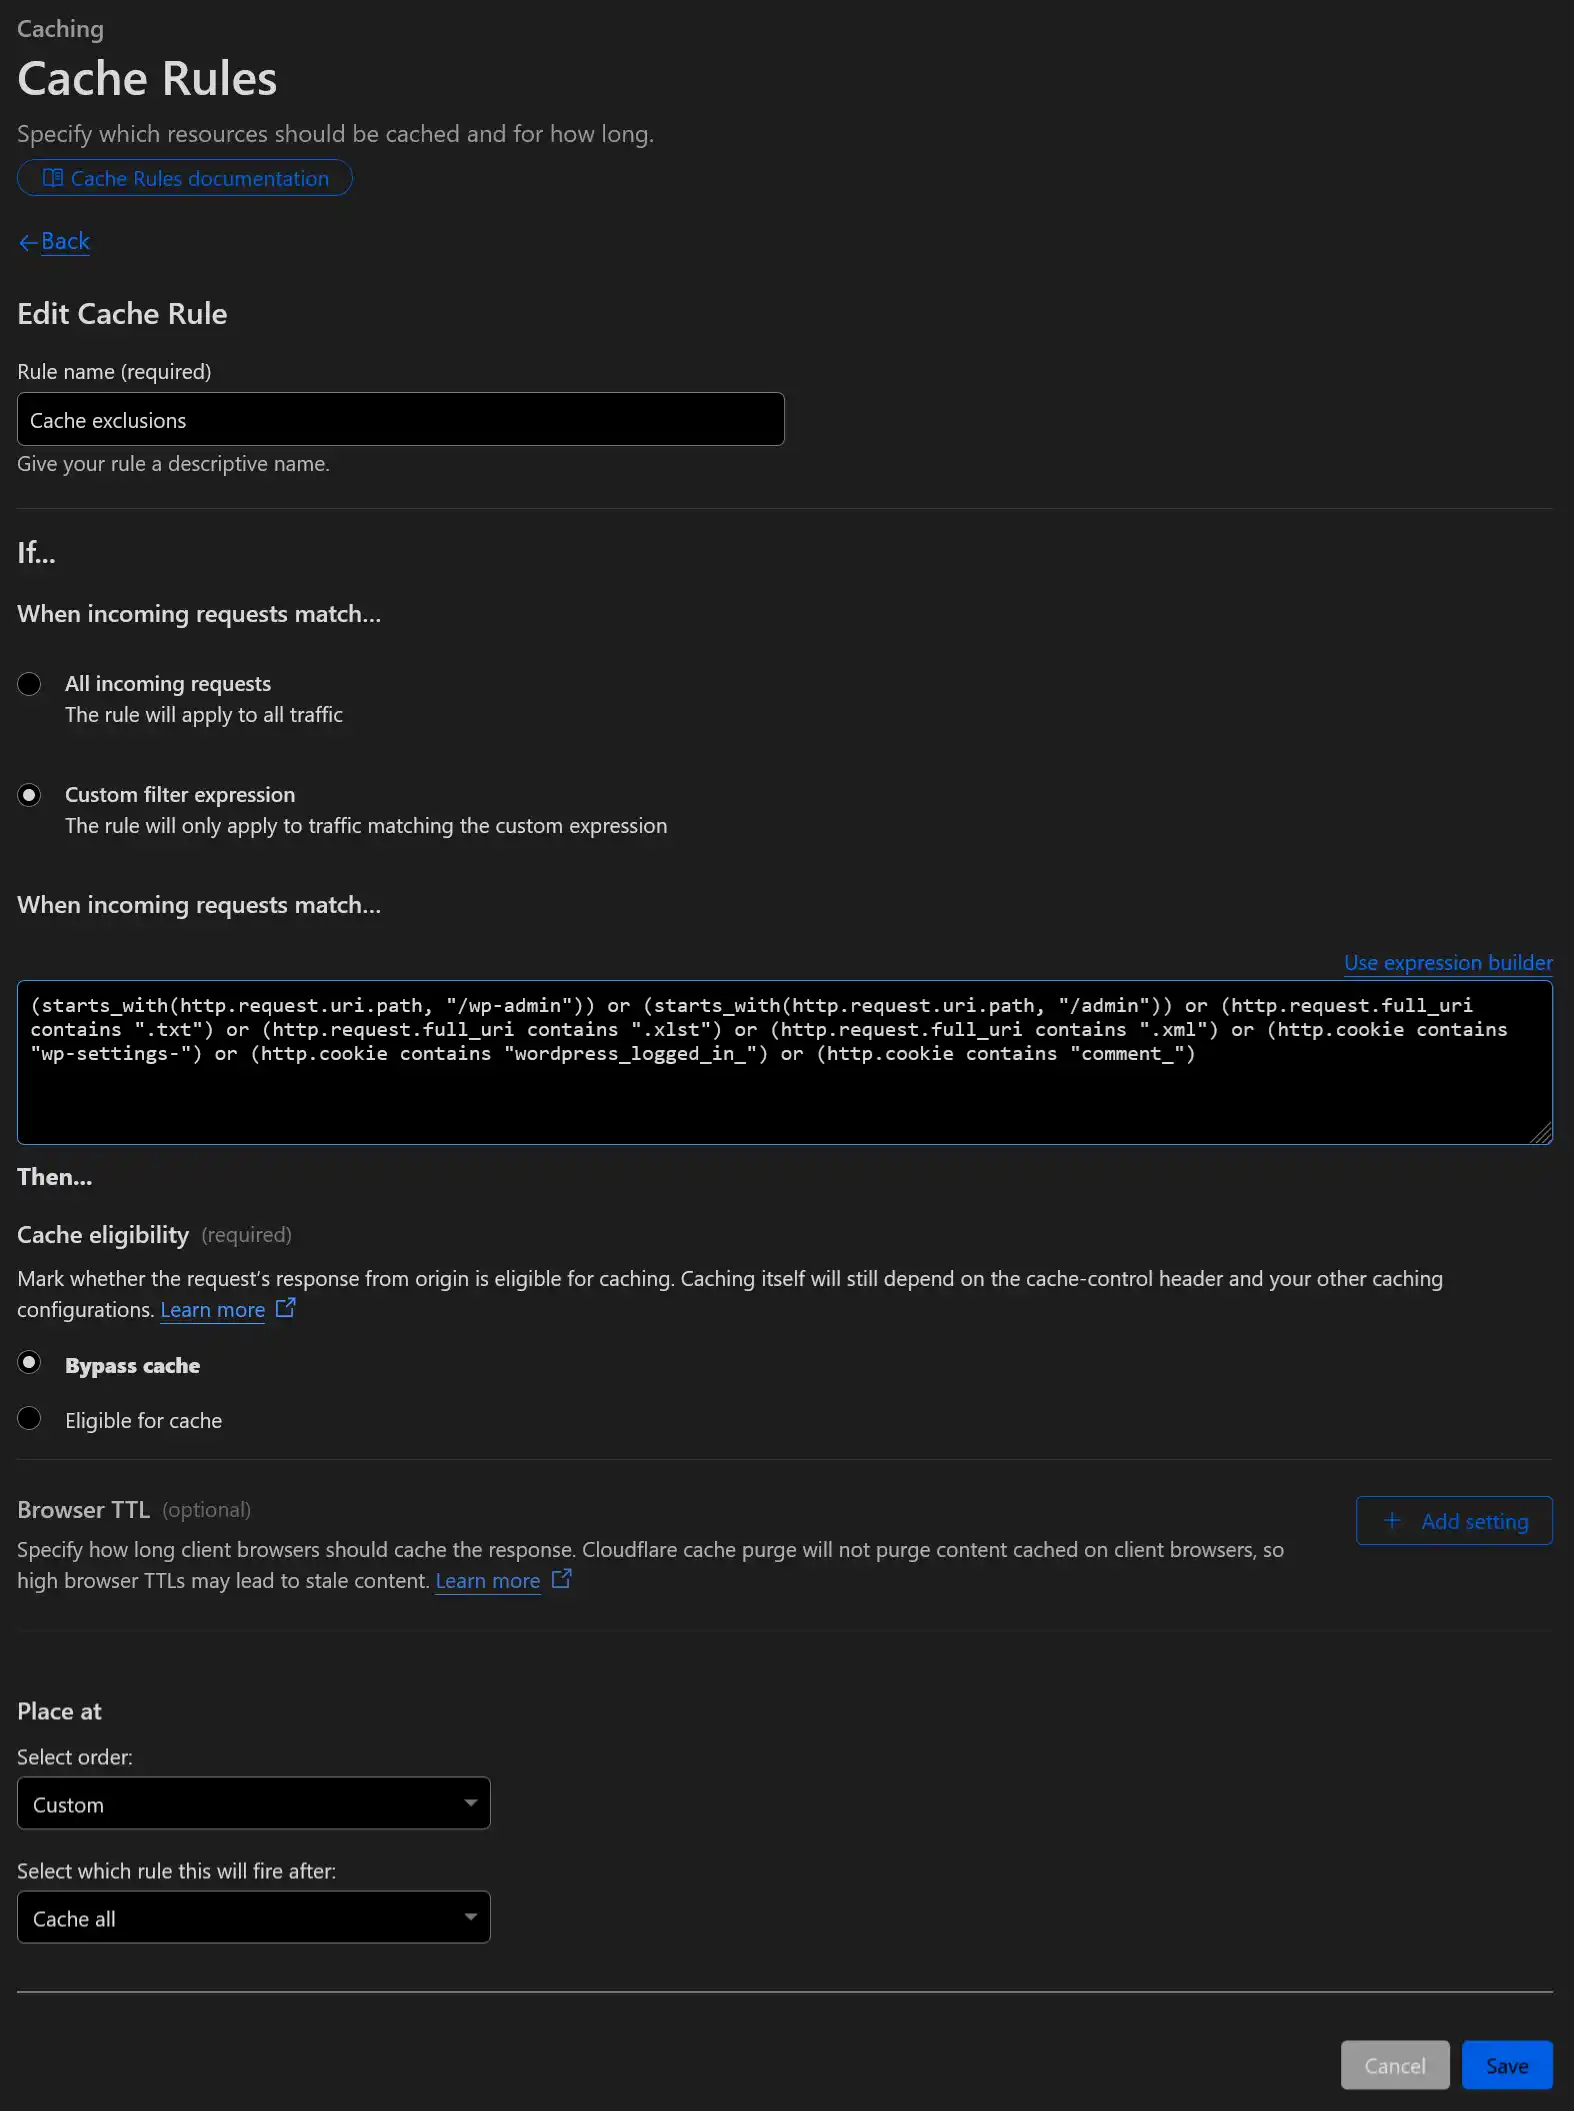
- Create another new rule with the following settings:
- Rule name: ‘Cache exclusions’
- When incoming requests match: ‘Custom filter expression’:
- Set the expression to the text within the code block below (you will need to change over from the visual builder)
- Cache eligibility: Bypass cache
- Ensure this runs last / after the previous ‘Cache all’ rule.
- Save this new rule.
(starts_with(http.request.uri.path, "/wp-admin")) or (starts_with(http.request.uri.path, "/admin")) or (http.request.full_uri contains ".txt") or (http.request.full_uri contains ".xlst") or (http.request.full_uri contains ".xml") or (http.cookie contains "wp-settings-") or (http.cookie contains "wordpress_logged_in_") or (http.cookie contains "comment_")Screenshot of my ‘Cache exclusions’ rule.
Testing Full-page Cache
Now that the caching is set up, open your website and open the developer console for your browser (f12). If you open the networking tab and refresh the page, you’ll be able to see the different files that load to compose your website. If you click on the first request for the page itself and review the headers for the request, you’re looking for a header called cf-cache-status. This header details if the Cloudflare cache was hit or not.
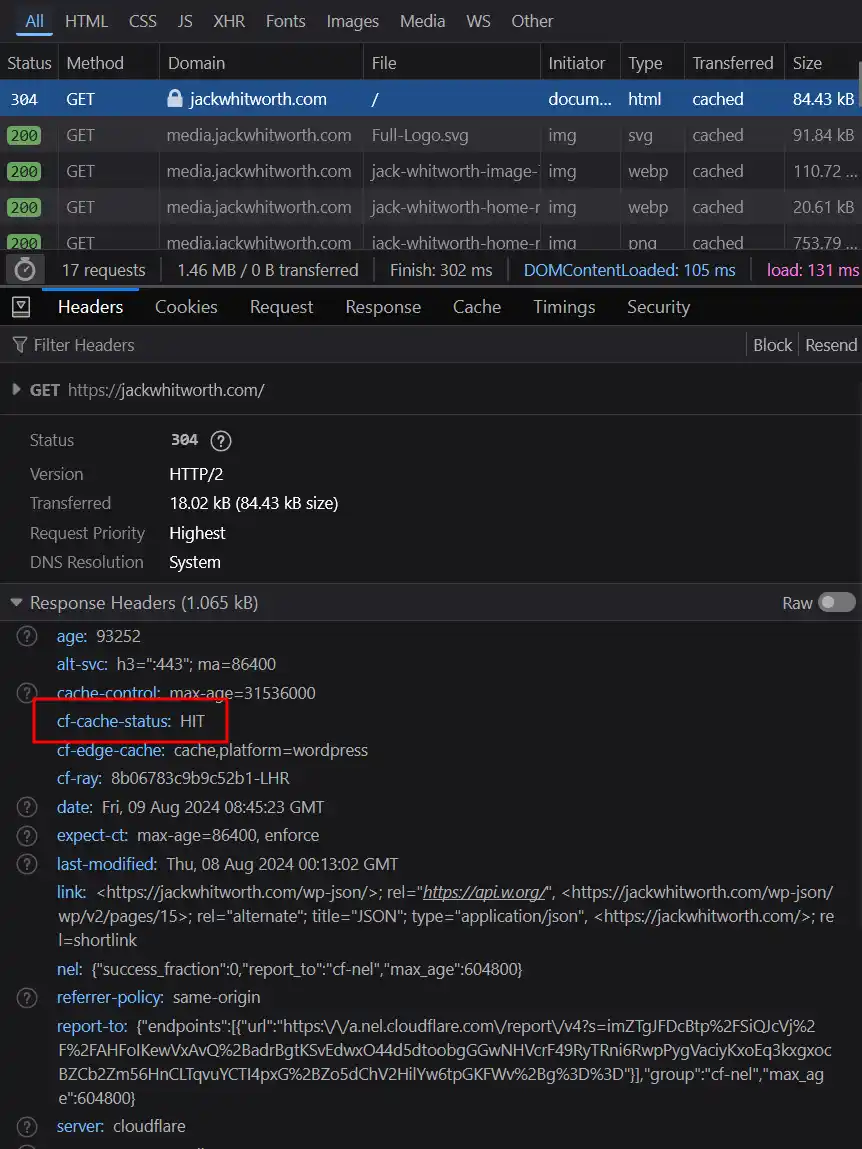
The different statuses you’ll see most commonly are:
MISS: If the caching is set up correctly but the page hasn’t yet been cached, the origin server will provide the data for Cloudflare and serve it to you. This first request will be a MISS, but subsequent requests shouldn’t be after this.HIT: If Cloudflare was able to fulfil the request without the origin server. This means the page was successfully loaded from the cache.DYNAMIC: This resource isn’t considered for caching. Anything you set up as an exclusion should return this status.
Advice for Full-page HTML Caching
If you have a low-traffic blog, have dynamic content, or are generally unsure of how this type of caching works, you can probably just forget about it. By caching assets with Cloudflare, such as your images and media as I explained earlier, you’re already going to be saving a lot of the load from your server. This type of caching is more of a ‘nice to have’ in most situations. My blog, for example, really doesn’t need it. The traffic is moderate, but still nowhere near taxing on my server. The only reason I’ve implemented this cache is because my content changes so infrequently that I’m comfortable putting a very long cache life in place (1 month!). Also, I’m a website load-speed enthusiast.
You’ll notice that in my caching policy, I have the ‘Edge TTL’ and ‘Browser TTL’ as two different values. The reason for this is that the ‘Edge TTL’ determines how long Cloudflare keeps a cached piece of content, and the ‘Browser TTL’ determines how long the browser of a user should consider the content it has saved locally as current/valid. By having a lower ‘Browser TTL’, I’m ensuring that my user’s browsers are re-querying Cloudflare more often, ensuring that minimal stale content is served. Even though most of the time the content won’t have changed on Cloudflare’s side, this stops the user from seeing old data for up to weeks after it should have been updated.
If you also use WordPress, I’d suggest implementing Cloudflare’s plugin. If you install and configure this plugin, you can have it clear a page’s cache when you update it. This means that, in my example, even though the cache lifespan is 1 month, if I change the content for one page, then the cache for that page is cleared only. When I make a new post I clear the whole site’s cache as the archives and homepage need to be re-rendered, but that too can be done from within the plugin, saving me from having to log in to Cloudflare’s dashboard.
Leave a Reply