
Introduction
I’ve built several projects using Pygame, such as a solar system simulation and a Zelda-like dungeon crawler. My biggest frustration has always been the complexity of sharing the projects with others. As a web developer, I’m very accustomed to being able to share my work online. Enter: Pygbag.
Demo
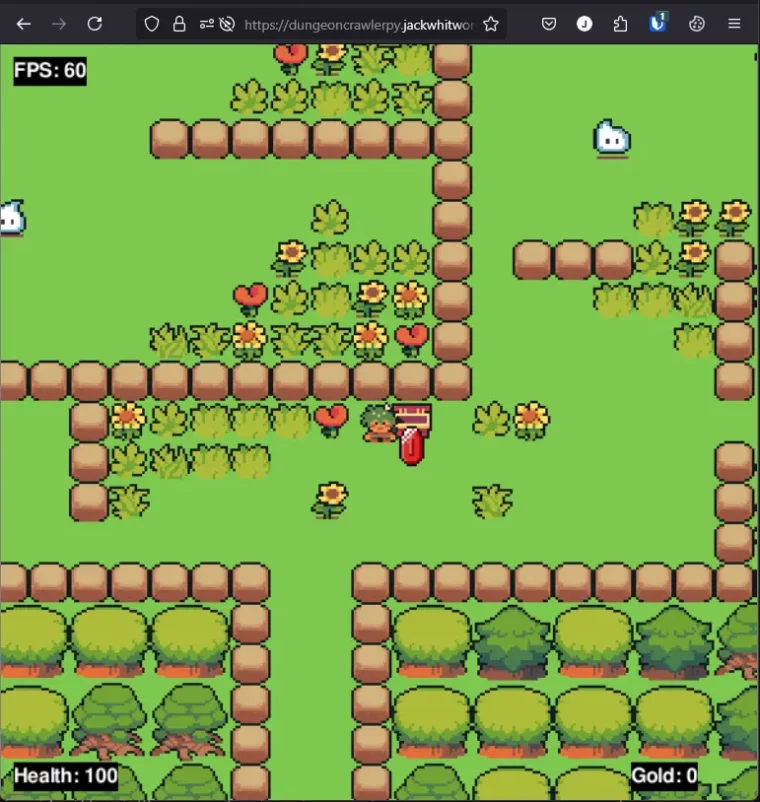
In case you’re not familiar with the two projects I’ve mentioned, both are open source, and both are also available to be run in the browser. This combination means that you can try both out locally, see how they work, and see how they compare when run online. Here’s everything you need to try them both out:
| Project | Dedicated Post | GitHub | Online Version (Pygbag) |
|---|---|---|---|
| Solar System Simulation | Python & Pygame Solar System Simulation | jmwhitworth/Pygame-Solar-System | solarsystempy.jackwhitworth.com |
| Dungeon Crawler | Pygame Dungeon Crawler Game | jmwhitworth/Pygame-Dungeon-Game | dungeoncrawlerpy.jackwhitworth.com |
What Is Pygbag?
Pygbag packages your Pygame script into WebAssembly, ‘a binary instruction format for a stack-based virtual machine.’ [1] According to Mozilla.org ‘… it (WebAssembly) is a low-level assembly-like language with a compact binary format that runs with near-native performance and provides languages such as C/C++, C# and Rust with a compilation target so that they can run on the web. It is also designed to run alongside JavaScript, allowing both to work together.’ [2]
On top of compiling to WebAssembly, Pygbag also includes a built-in test server that is enabled by default so you can immediately test your build locally before deploying it elsewhere. Overall, this makes the whole process of building, testing, and deploying your project quite simple.
How To Package Pygame Using Pygbag
The best way to get started with Pygbag is to read their documentation. However, I’ll show you how I’ve gone about implementing support for it on my projects.
Installing The Pygbag Package
You’ll need to install the package using your package manager of choice. More often than not, this is Pip. However, I’ve recently started using Poetry, as it utilises package locking.
# Using PIP
pip install pygbag
# Using Poetry
poetry add pygbagModifying Project Code
Pygbag requires a couple of code changes to be made for it to run correctly in the browser. These changes shouldn’t change the way your code behaves when run natively with Python.
For this, I’m copying the instructions directly from their documentation, as they’ve already summed this up perfectly:
- Name the file with your game loop
main.py. - Add
import asyncioto the script containing your game loop. - Encapsulate your variable declarations (other than the window, as other functions might use it too)
- Put the game loop inside
main(). It must be an asynchronous function (useasync definstead ofdef). - Put
await asyncio.sleep(0)anywhere in your game loop. Right after yourclock.tick()is fine. - Put
asyncio.run(main())at the end of the file. The game loop will be run here, so any additional lines will not be run.
Here is their provided code example:
import asyncio
import pygame

pygame.init()
pygame.display.set_mode((320, 240))
clock = pygame.time.Clock()


async def main():
    count = 60

    while True:
        print(f"{count}: Hello from Pygame")
        pygame.display.update()
        await asyncio.sleep(0)  # You must include this statement in your main loop. Keep the argument at 0.

        if not count:
            pygame.quit()
            return

        count -= 1
        clock.tick(60)

asyncio.run(main())
Building The Project
Now it is time to build your project. Since we’ve installed Pygbag via Pip/Poetry, we can access the pygbag command when we run it within the correct context. By this, I mean that you must either be within the directory where the package is installed or you should have the correct virtual environment loaded.
The command you need to use is:
# Using PIP
pygbag .
# Using Poetry
poetry run pygbag .The
.refers to the directory where yourmain.pyfile is located. By using.we’re saying that it’s in the current directory. If it was located somewhere else, you can either change into that directory, or pass that directory to the command instead.
When this is done, you should see a new directory appear called build. The terminal output should also advise something along the lines of Serving HTTP on 127.0.0.1 port 8000 (http://localhost:8000/) …. As it advises, you can then visit that URL on your machine to preview the build.
To see a list of options, you can run
pygbag --help .
Deploying The Build
The build folder should contain 3 files:
favicon.pngindex.htmlyour-app.apk
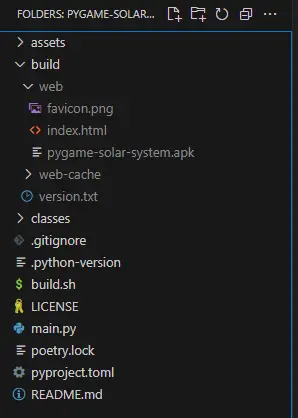
The index.html file loads in the required Javascript to support running the .apk file. This means that what you now have is a static website. Deploying this to be accessible via the internet can be done in countless ways. As it’s essentially a static site, you can attempt to utilise some free services or use any other host of your choice. The important thing is to ensure that you keep these files together and that the index.html file is used as the entry point. I self-host all of my services using Dokploy on a VPS. In my case, I just zipped these files up and uploaded them to my server.
Compromises With Pygbag
As the WebAssembly build isn’t running on native Python, there are tradeoffs to be aware of.
Performance
CPU intensive applications have a much harder time running after being compiled. For example, the Solar System simulation I made runs on my computer with 60 frames per second when run natively, but when run in the browser after being compiled, it runs at around 15. The reason is purely due to it being a CPU-bound program. Each frame performs thousands of calculations to have all the objects orbit each other. Meanwhile, the dungeon crawler is less CPU intensive and uses more graphics and sprites. In my experience, this runs perfectly. The thing to be aware of here is that you should test the performance fully after the build is done, as the experience won’t be identical to native Python.
There’s more on this in the next point on package support, but I’ve researched using multiprocessing to try to speed up my CPU-bound app. Sadly, there’s no form of multiprocessing, threading, or any similar implementations supported in WebAssembly builds. One thread to rule them all.
Package Support
In my case, I’ve been fortunate not to have any issues with requiring third-party packages. My two example projects are both coded from scratch without any physics libraries or anything else external to Pygame itself. If you’re using any third-party libraries, you may need to validate that they work as WebAssembly builds. If you’re working on an existing project, you can just try the build and see what happens or Google the libraries you’re using. If you’re looking to add a library and aren’t sure about its support, add it as minimally as possible and test it first before fully committing to using it for your project.
Troubleshooting
If you encounter any issues with the build itself, you should consult their documentation and also review your code to ensure it matches the example above in terms of implementing asyncio.
If the build succeeds and you can visit the 127.0.0.1:8000 address, but you’re met with either a black screen or it simply gets stuck, close the tab and go to 127.0.0.1:8000/#debug. This will enable a verbose output of how the script loads and will provide the information for why it’s not working.
Leave a Reply