
What are Livewire and Volt?
Livewire allows you to build ‘Powerful, dynamic, front-end UIs without leaving PHP’. For me, as a PHP fanboy, it’s quickly becoming my bread and butter for creating reactive components all within the comfort of my own backyard. Livewire Volt is a package you can use on top of Livewire, described as ‘… an elegantly crafted functional API for Livewire that supports single-file components’. This takes Livewire to the next level, as it allows components to be built out within a single class.
What is a Honeypot?
A honeypot, in this context, is a method of preventing form submission spam. The core idea is to add a hidden field to your form that normal users can’t see, and needn’t know exists. This hidden field should start blank and, upon forms being submitted, we can validate against the content of this field. Automated bots that fill out forms will usually populate data into every available field, this is to stop forms from failing due to missing required data. This means that if a form is submitted and the honeypot field contains information, then it’s safe to assume the submission was made either by a bot, or a user who’s not interacting with the form in the intended way.
Creating a Livewire Volt Component
For this example, I’ll assume you have Laravel set up. I’m running PHP 8.2, Livewire 3.4 and Volt 1.6.
With everything installed, creating a component is as simple as using the artisan CLI command:
php artisan make:volt contactformThis will create a file: /resources/views/livewire/contactform.blade.php
This will give you a starter file like this:
<?php

use Livewire\Volt\Component;

new class extends Component {
    //
}; ?>

<div>
    //
</div>
You can display this new component by using the following code within a blade template:
<livewire:contactform />Creating a Basic Contact Form with Livewire Volt
Now everything’s ready, here’s some boilerplate code for a contact form built with Livewire Volt:
<?php

use Livewire\Attributes\Validate;
use Livewire\Volt\Component;

new class extends Component {
    #[Validate(['required', 'string', 'max:255'])]
    public string $subject;

    #[Validate(['required', 'string', 'max:255'])]
    public string $name;

    #[Validate(['required', 'string', 'lowercase', 'email', 'max:255'])]
    public string $email;

    #[Validate(['required', 'string'])]
    public string $body;

    public function submit()
    {
        $this->validate();

        // Store in DB and/or email notification to yourself

        session()->flash('success', 'Thank you for your contact submission. We\'ll respond to your message as soon as possible.');
    }
}; ?>

<div>
    <!-- Show success message -->
    @if (session('success'))
        <span>{{ session('success') }}</span>
    @endif

    <!-- Display any erros -->
    @if ($errors->any())
        <ul>
            @foreach ($errors->all() as $error)
                <li>{{ $error }}</li>
            @endforeach
        </ul>
    @endif

    <form wire:submit="submit">
        <input placeholder="*Subject" type="text" aria-label="Subject" wire:model="subject" />
        <input placeholder="*Your name" type="text" aria-label="Your name" wire:model="name" />
        <input placeholder="*Email" type="email" aria-label="Email address" wire:model="email" />
        <textarea placeholder="*Message" type="text" aria-label="Your message" wire:model="body"></textarea>
        <button type="submit">Submit message</button>
    </form>
</div>
Even if you’re not familiar with Volt itself, this form should prove to be easy to understand due to the way we structure our code within Livewire Volt components.
We declare 4 public attributes:
subjectnameemailbody
On each of these attributes, we have validation rules that enforce certain criteria. All of them are required and are set to be strings. Then email is validated as an email address, and all except the body must be less than 255 characters in length.
We have a submit method which first validates all fields (line 21), and then sets a success message in the session (line 25). You’ll notice in between these two actions, I’ve left space for where you might add extra functionality such as storing the submission or sending yourself a notification email (line 23).
Moving on to the template part, starting at line 29, we have some conditional logic that will display the session’s success message, or display any errors if they are present. Errors are automatically handled when $this->validate() is called within our submit method earlier.
Finally, we have the form itself. Using the wire:submit directive, we’ve set the form to run the submit method when it’s submitted. The form has 4 fields, each paired to an attribute via the wire:model directive. This ensures that the class attributes are updated to match the field value automatically.
If any of this isn’t clear to you, or you’re having trouble getting anything to work, please consult the Livewire and Livewire Volt forms documentation.
Adding a Honeypot to Livewire Volt
To add a Honeypot field to this Livewire Volt form, we need to do 3 things:
- Add an attribute for the honeypot field value.
- Check the value is blank when the form is submitted.
Here’s an updated copy of the above code, with our honeypot included:
<?php
use Livewire\Attributes\Validate;
use Livewire\Volt\Component;
new class extends Component {
#[Validate(['required', 'string', 'max:255'])]
public string $subject;
#[Validate(['required', 'string', 'max:255'])]
public string $name;
#[Validate(['required', 'string', 'lowercase', 'email', 'max:255'])]
public string $email;
#[Validate(['required', 'string'])]
public string $body;
// Honeypot field
public string $winnieThePooh = '';
public function submit()
{
$this->validate();
// If honeypot contains data
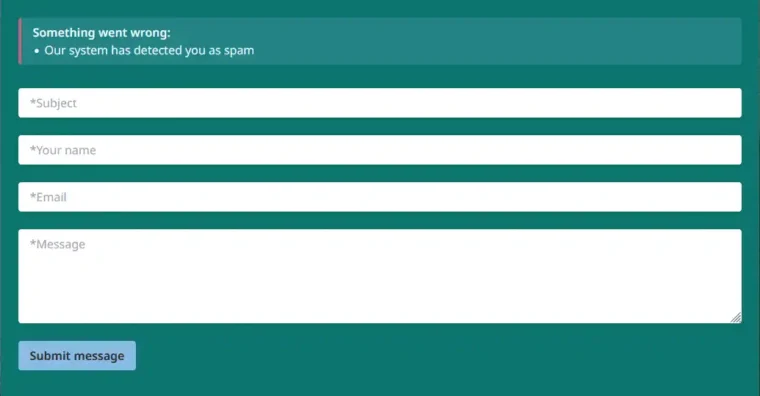
if ($this->winnieThePooh != '') {
$this->addError('Spam detected', 'Our system has detected you as spam');
$this->reset();
return;
}
// Store in DB and/or email notification to yourself
session()->flash('success', 'Thank you for your contact submission. We\'ll respond to your message as soon as possible.');
}
}; ?>
<div>
<!-- Show success message -->
@if (session('success'))
<span>{{ session('success') }}</span>
@endif
<!-- Display any erros -->
@if ($errors->any())
<ul>
@foreach ($errors->all() as $error)
<li>{{ $error }}</li>
@endforeach
</ul>
@endif
<form wire:submit="submit">
<input placeholder="*Subject" type="text" aria-label="Subject" wire:model="subject" />
<input placeholder="*Your name" type="text" aria-label="Your name" wire:model="name" />
<input placeholder="*Email" type="email" aria-label="Email address" wire:model="email" />
<textarea placeholder="*Message" type="text" aria-label="Your message" wire:model="body"></textarea>
<input type="text" aria-hidden="true" class="hidden" wire:model="winnieThePooh" />
<button type="submit">Submit message</button>
</form>
</div>
Let’s go over the changes:
- Line 20: We’ve added a honeypot field as a string, and have specifically declared its starting value. I like to do this for clarity.
- Lines 27-31: After the other fields are validated, we check that the honeypot field is equal to the starting value we declared. If it isn’t, we set a custom error for the session and reset all other fields before returning out of the method call to stop execution. This is a slightly manual approach, as you can use validation rules to do this, but I prefer the verbose readability.
When the form is submitted, if the honeypot field is blank, the form continues as it normally would and the user is non-the-wiser. If there is data within the field, an error is thrown and all other inputs are reset. If the submission was made by a bot, then we’ve saved ourselves some spam. If it was made by a user who revealed the honeypot field and entered information for some reason, they’ll know why the form failed.
Is a Honeypot Necessary for Livewire?
I’ll be honest: It probably isn’t. Livewire forms don’t use traditional endpoints and include session tokens by default. A typical spam bot won’t be able to use it without simulating a full, Javascript-aware browser.
As an extra measure of security, it can’t hurt. If you are getting spam submissions (it’s not impossible), this is a good first step to try to counter them before going for more invasive methods such as CAPTCHAs.
Other Ways to prevent Livewire Form spam
Besides honeypots, another way to help counter spam is by adding timers. By tracking when the form is loaded vs when it’s submitted, you can counter spam bots by blocking any submissions made within a few seconds. This assumes that a bot loads the page and immediately completes the form to submit it, whereas a human would take at least a few moments.
If you’re interested in seeing an example of this in another article, please let me know in the comments or via my contact form.
Demonstration
This code was extracted from a project of mine called Hermitclock. You can see the honeypot live on this page of the Hermitclock website.
Leave a Reply